The Frog Fairy - project fated to be a disaster... OOAK doll figurine
Catmeleon Studio・2 minutes read
The text details the process of creating a summer-themed water creature fairy doll, including steps such as customization of the doll's head and body, face sculpting challenges, and the creation of froggy feet, tail, and wings using epoxy and UV resin. The creator also crafted a stand for the doll figurine and used a vacuum chamber to remove air bubbles from resin, resulting in a unique and successful frog fairy figurine with vibrant colors and textures.
Insights
- The process of creating a summer-themed fairy near water involved intricate steps such as hair removal, head shrinking, neck fixing, face sculpting, body mutilation, and the addition of unique features like froggy feet and wings using epoxy and UV resin.
- Utilizing a vacuum chamber to remove air bubbles from resin played a crucial role in achieving a clear finish for the doll figurine. Additionally, incorporating ripples on the water surface with high gloss mod podge and an airbrush resulted in a distinctive frog fairy figurine, showcasing the creator's satisfaction with the final product's colors and textures.
Get key ideas from YouTube videos. It’s free
Recent questions
How can I customize a doll for summer activities?
The process involves removing the doll's hair, shrinking the head in an acetone-water solution, fixing the neck with epoxy sculpt, altering the head by removing fishy ears and lower lip, shaping a new mouth, fixing the neck with epoxy and super glue, sculpting the face with cotton pad and Mr. Super Clear, adding patterns with UV resin, cutting the torso, legs, and feet, reconnecting with wires and epoxy, creating froggy feet, tail, and wings with epoxy and UV resin, painting and shading details.
What materials are needed to create a unique doll figurine?
Materials required include acetone, epoxy sculpt, super glue, cotton pad, Mr. Super Clear, UV resin, wires, epoxy, acrylic paint, high gloss mod podge, airbrush, wooden block, kitty litter, wood glue, grass, rocks, bushes, vacuum chamber.
How can I make a stand for a doll figurine?
The creator made a stand using a textured base from a wooden block mixed with kitty litter and wood glue. They sanded the sides, drilled a hole for a cat tail, painted it with brown acrylics, added grass, rocks, bushes with mod podge, placed it in a vacuum chamber to remove air bubbles from epoxy resin for a clear finish.
What challenges did the creator face during the doll customization process?
The creator encountered challenges in face sculpting, adjustments with cotton pad and Mr. Super Clear, addition of patterns on the doll's head for a 3D texture with UV resin, body mutilation process involving cutting torso, legs, and feet, reconnection with wires and epoxy, creation of froggy feet, tail, and wings with epoxy and UV resin.
How did the creator achieve a clear finish on the doll figurine?
The creator used a vacuum chamber to eliminate air bubbles from resin, resulting in a clear finish. They added ripples on the water surface with high gloss mod podge and an airbrush, creating a one-of-a-kind frog fairy figurine with unique colors and textures.
Related videos

Catmeleon Studio
The Pumpkin Fairy - OOAK Halloween Special Repaint - because you were asking for it!
Enchanterium
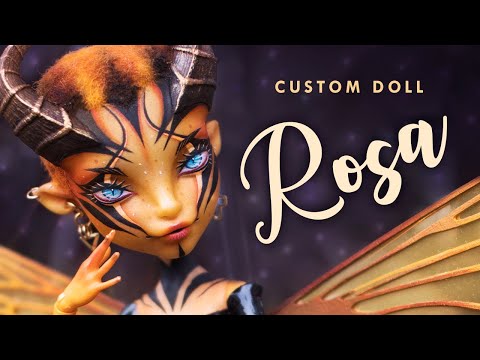
Rosa the Wasp Demon • Bug Girls COLLAB • Custom Monster High Doll OOAK• xTool M1 and RA2 pro

etellan
✰MAKING A CUSTOM ALIEN DOLL✰ ALIEN SPACE CREW COLLAB | monster high repaint | [relaxing]

etellan
THE POTION MASTER | PART 1| Resin eyes and Face up | Rainbow high Custom figure |

etellan
REVAMPING OLD DOLLS | LAGOONA BLUE MONSTER HIGH |Doll repaint and customisation [relaxing] | etellan


Summary
00:00
"Summer Water Fairy Doll Customization Process"
- Summer-themed fairy creation near water for summer activities
- Choice of water creature theme for the fairy
- Preparation steps for doll customization: hair removal, head shrinking in acetone-water solution
- Fixing the doll's neck with epoxy sculpt
- Alterations to the doll's head: removal of fishy ears, lower lip, and shaping of new mouth
- Neck fixing with epoxy and super glue
- Face sculpting challenges and adjustments with cotton pad and Mr. Super Clear
- Addition of patterns on the doll's head, leading to a 3D texture with UV resin
- Body mutilation process: cutting torso, legs, and feet, reconnection with wires and epoxy
- Creation of froggy feet, tail, and wings with epoxy and UV resin, painting and shading details
25:40
"Clear resin stand and frog figurine"
- The creator crafted a stand for a doll figurine using a textured base made from a wooden block mixed with kitty litter and wood glue. They sanded the sides on a belt sander, drilled a hole for a cat tail, painted the stand with brown acrylics, and added grass, rocks, and bushes with mod podge. The stand was then placed in a vacuum chamber to remove air bubbles from epoxy resin, resulting in a clear finish after 72 hours of curing.
- To create a unique doll figurine, the creator used a vacuum chamber to eliminate air bubbles from resin, achieving a clear finish. They added ripples on the water surface with high gloss mod podge and an airbrush, resulting in a one-of-a-kind frog fairy figurine. Despite initial fears, the project was successful, showcasing the creator's satisfaction with the final product's colors and textures.


