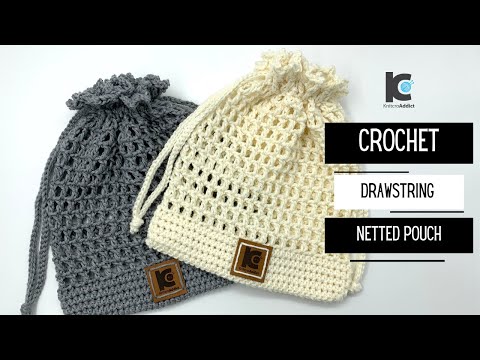
코바늘 하트 네트 파우치 crochet heart net pouch_by아델
아델코바늘 Adel Crochet・29 minutes read
The text details creating a heart mat pouch wool net pattern with a silver heart design by following specific instructions for knitting pillars, long knits, and chains using a vintage sheath and size 6 crochet hook. The process involves repeating the net pattern, adjusting stitches for an even count, and finishing with a sharp tip at the end of the heart design to complete the intricate pouch.
Insights
- Detailed instructions are given for creating a heart mat pouch wool net pattern with a silver heart design, emphasizing the use of a vintage sheath and size 6 crochet hook.
- The process of knitting the net pouch includes intricate steps such as creating pillars with chains, long knits, and a zig-zag pattern, ensuring an even stitch count and specific adjustments for horizontal length, culminating in a sharp tip at the heart design's end.
Get key ideas from YouTube videos. It’s free
Recent questions
How do I create a heart design on a net pouch?
By mixing strings and following detailed knitting instructions.
Related videos

아델코바늘 Adel Crochet
하트 네트 파우치뜨기~ 조리개 파우치 만들기 Crochet Net Pouch~
KnitcroAddict
Crochet Drawstring Netted Pouch ( Free Pattern )

아델코바늘 Adel Crochet
코바늘 네트 파우치 튤립 crochet net pouch tulip _아델핸즈

아델코바늘 Adel Crochet
코바늘 지갑뜨기 V파우치 & 클러치 가방~ crochet Rib Clutch Bag

아델코바늘 Adel Crochet
[Eng Sub] 코바늘 초보자 네트 파우치 crochet net pouch for beginner_by아델

Summary
00:00
"Knitting Heart Mat Pouch with Wool"
- The text discusses creating a heart mat pouch wool net pattern as a second version of a basic net pouch.
- Instructions are provided on mixing strings to create a cool net pattern with a silver heart design.
- The process of knitting the net pouch with a heart design is detailed, including using a vintage sheath and size 6 crochet hook.
- Starting with 39 stitches, the net pattern requires an even number and adjustments for horizontal length.
- The knitting process involves creating pillars with chains and long knits, ensuring an even number of stitches.
- Detailed steps are given for knitting the net pattern, including skipping stitches and creating a zig-zag pattern.
- The text emphasizes adding long knits at corners and adjusting stitches to maintain an even count.
- Instructions are provided for continuing the net pattern with additional long knits and chains.
- The process involves repeating the net pattern until completion, ensuring a consistent design throughout.
- The final steps involve finishing the net pattern with additional long knits and creating a sharp tip at the end of the heart design.
22:26
"Net Pattern Knitting Techniques Revealed"
- Knit the 9th 1 long knit and check it together.
- Set up three rows of pillars and add one more chain due to the net pattern.
- Knit the Hangil long knit and Mimong, followed by a chain and Hangil long knit.
- Verify the 9th 1-gil long knit is correct, ensuring the 9th knit is in place.
- Start the inner knit with 7 Korean knits, adding more long knits in a row.
- Utilize a specific code when floating in the net pattern.
- Knit glasses by saving the nose to knit and floating in the world.
- Wake up after 1 hit out of a total of 7, followed by additional knits.
- Knit the 9th column 1 long, then proceed with a net pattern.
- Finish by knitting the first and last 1 long knit, adding half of the Nava belly knit to the third yarn.
44:23
Creating Heart-Shaped Knitted Pouch with Net
- The knitting process involves creating a net pattern with specific lengths and sequences for each row.
- Instructions include skipping chains, knitting long stitches, and repeating net patterns to form a heart shape.
- The net pattern continues throughout the knitting process, with specific instructions on creating holes and filling the heart shape.
- The completion of the heart shape involves knitting multiple rows with the net pattern.
- The final steps include finishing the knitting, cutting the yarn, and creating a string for the pouch.
- Detailed instructions are provided for creating the string, including chain knitting, specific lengths, and tying the ends securely.


