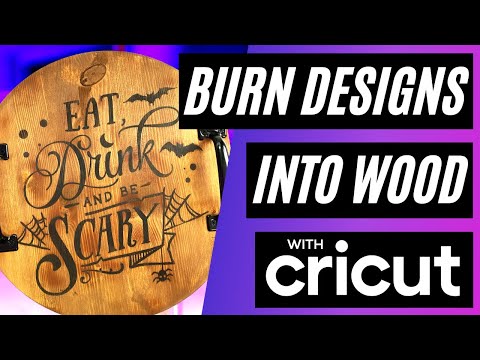
How to Burn Designs Into Wood using your Cricut!
Jennifer Maker・23 minutes read
Jennifer Maker shares her journey of learning wood burning in the '90s and showcases modern techniques in her wood burning projects, emphasizing safety and precision. Materials needed include various items like ammonium chloride, Thick-It, and a Cricut cutting machine, with detailed instructions provided for each step in the process.
Insights
- Jennifer Maker utilizes modern wood burning techniques learned in the '90s to craft diverse projects like cutting boards and signs, employing safe methods involving chemicals and stencils.
- Detailed instructions provided by Jennifer cover the entire process, from preparing design files for cutting to applying vinyl stencils and utilizing food-safe chemicals like ammonium chloride, emphasizing safety, precision, and troubleshooting throughout the tutorial.
Get key ideas from YouTube videos. It’s free
Recent questions
What techniques are used for wood burning?
Chemicals and stencils are popular techniques.
What materials are required for wood burning projects?
Wood blanks, chemicals, tools, and safety equipment.
How can design files be prepared for a Cricut machine?
Detailed instructions are provided for design file preparation.
What safety precautions should be taken for wood burning?
Safety precautions, tips, and protective gear are essential.
What is the recipe for creating a wood-burning gel?
The recipe involves ammonium chloride, Thick-It, and warm water.
Related videos

Jennifer Maker
25 Best Cricut Tips, Tricks, Shortcuts, Hacks, & Hidden Features

Jennifer Maker
CRICUT: Everything I Wish I Knew When I First Started! | Maker Academy Weekend 2022 Tool Class
Mr. Crafty Pants
🔥 BURN PICTURES & DESIGNS INTO WOOD WITH ANY CRICUT CUTTING MACHINE | CRICUT TUTORIAL FOR BEGINNERS

Jennifer Maker
Cricut Iron-On T-Shirt Tutorial - Beginner Friendly!
Jennifer Maker
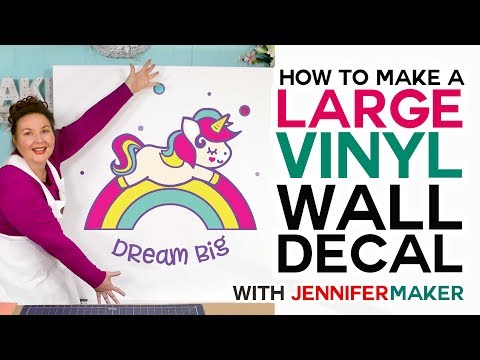
Make a Large Vinyl Wall Decal - How to Cut Larger Than Mat on a Cricut!

Summary
00:00
Jennifer Maker's Wood Burning Journey and Projects
- Jennifer Maker shares her journey of learning wood burning in the '90s and how she now uses modern techniques to create beautiful projects.
- She showcases various wood burning projects like a cutting board, a Santa cookie tray, and a chillin' and grillin' sign.
- Two popular techniques for wood burning involve chemicals and stencils, both being food safe.
- Materials needed for wood burning projects include wood blanks, ammonium chloride, Thick-It, Scorch Marker, heat gun, Cricut cutting machine, permanent vinyl, transfer tape, and safety equipment.
- Jennifer provides detailed instructions on how to prepare design files for cutting on a Cricut machine.
- Steps for preparing the wood surface for wood burning involve sanding and ensuring it is free of any finishes.
- Instructions for weeding and transferring the vinyl stencil onto the wood are provided, emphasizing the importance of precision.
- Jennifer demonstrates the process of burning designs into wood using ammonium chloride, a food-safe chemical.
- Detailed steps for applying the vinyl stencil onto the wood and ensuring it adheres properly are outlined.
- Safety precautions, tips for troubleshooting, and a guide on how to rectify mistakes are included in the tutorial.
13:49
"Wood-Burning Gel Recipe and Techniques"
- Ammonium chloride is a food additive found in various food items.
- Thick-It is a cornstarch-based food and beverage thickener.
- Some individuals may be sensitive to ammonium chloride, necessitating protective gear when handling it.
- A recipe for creating a wood-burning gel involves one tablespoon of ammonium chloride, eight teaspoons of Thick-It, and 1/2 a cup of warm water.
- The gel can be stored for several weeks in a covered glass container.
- Applying a single thin coat of gel onto wood is crucial to prevent a filmy appearance and stencil bleeding.
- Heat the wood with a heat gun set to at least 495 degrees Celsius, moving continuously to avoid overburning.
- Using a Scorch Marker for wood burning may result in bleeding under the stencil and less dark burns.
- The EasyPress can be used as an alternative to a heat gun for wood burning, requiring 400 degrees Fahrenheit and 20-second intervals.
- Finishing touches involve adding hooks and hangers to the wood sign.
28:16
Jennifer Maker encourages viewers to create projects.
- Jennifer Maker expresses excitement to see viewers' projects and offers assistance in bringing them to life.
- She concludes by signing off as Jennifer Maker, encouraging viewers to create a life they love.


